
Overview
Connect Stripe so your clients pay you directly through your own branded checkout. Vapify never holds your funds. Payments go straight to your Stripe account.Prerequisites
- Provider connected
- A business you can register with Stripe (or an existing Stripe account)
Steps
1
Start the connection
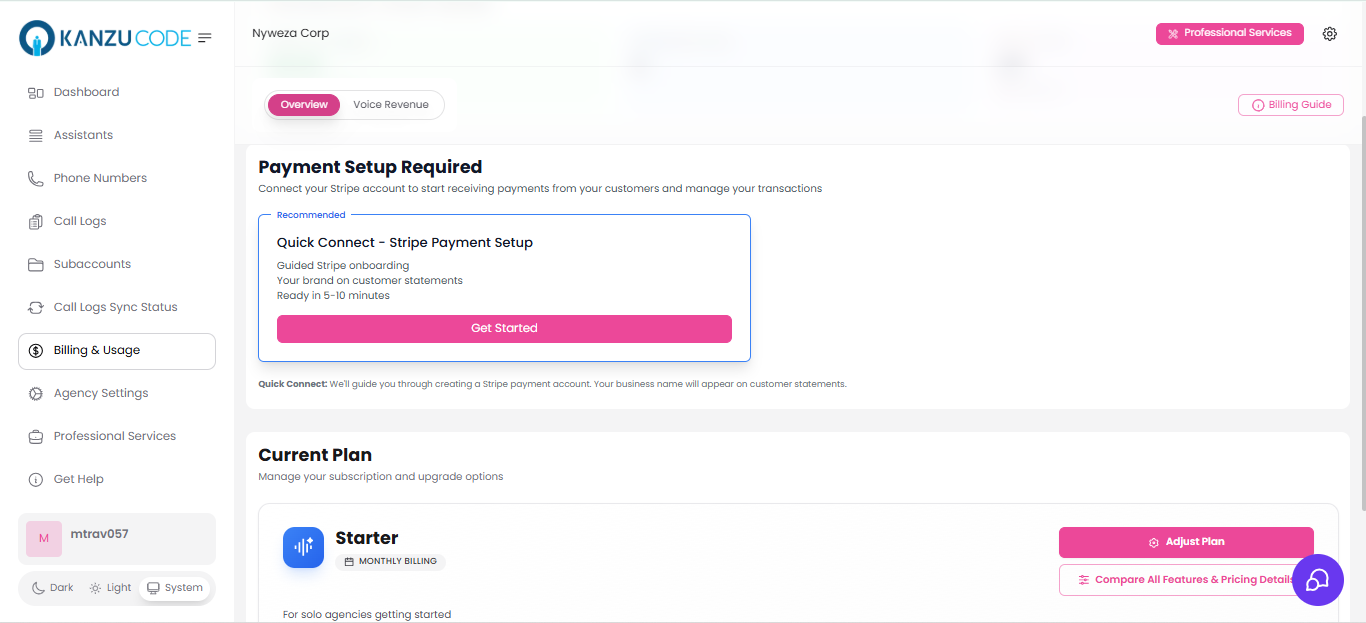
From Billing & Usage, find the Connect Stripe Account card and click Get Started.
2
Complete Stripe onboarding
You’ll be redirected to Stripe. Complete Stripe’s onboarding: business information, banking details for payouts, and identity verification.
3
Confirm the connection
Once connected, confirm you see a Connected Account ID and an active status on the Billing & Usage page.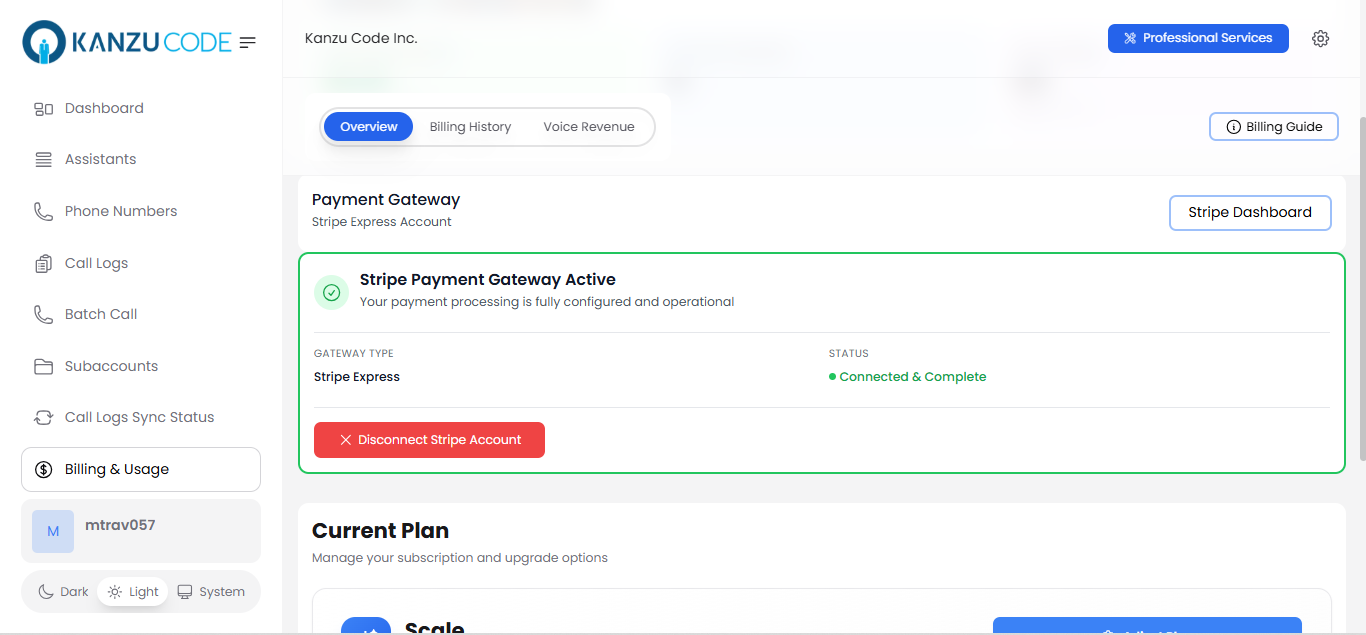
Stripe onboarding typically takes 5-10 minutes. Your clients’ payments go directly to your Stripe account. Vapify never touches the funds.
Tips
- Keep a link to your Stripe Dashboard handy. You’ll use it to view payments, payouts, and issue refunds.
Video Tutorial
Troubleshooting
- Onboarding stuck or incomplete: Return to Billing & Usage and click Get Started again to resume where Stripe left off.
- Need to disconnect: Go to Agency Settings → Billing, click Disconnect Stripe, and confirm. This stops new client payments and subscriptions immediately.
Related Articles
- How Billing Works: how provider cost, markup, and Stripe payouts fit together
- Stripe Integration: full reference including refunds and disconnecting
- Configure Pricing: set the rates clients are charged