Welcome
We’re thrilled to have you onboard. Vapify empowers voice AI agencies to deliver advanced, customizable voice AI solutions through a white-label platform. With Vapify, you can manage your clients and their voice assistants, markup the voice assistant per minute charges, and simplify the process of scaling your business.Getting Started
There are two ways to get started with Vapify:- Quick Setup (Recommended for new users): Complete the 4-step onboarding wizard that guides you through essential configuration in just 5-10 minutes
- Detailed Configuration: Follow our comprehensive Quick Start Guide for in-depth setup instructions
Quick Start Guide
Step-by-step setup from branding to go-live
FAQ
Common setup, billing, and subaccount answers
First-Time Setup: Onboarding Wizard
When you first log into Vapify, you’ll be greeted by an intuitive 4-step onboarding wizard designed to get your agency up and running quickly. This wizard covers the essentials: branding your dashboard, connecting your voice AI provider, creating your first client sub account, and launching into your dashboard.The onboarding wizard takes approximately 5-10 minutes to complete and can be skipped if you prefer to configure settings manually later.
Step 1: Agency Details
The first step is all about branding your Vapify dashboard with your agency’s identity. This ensures that when your clients log in, they see your branding, not Vapify’s.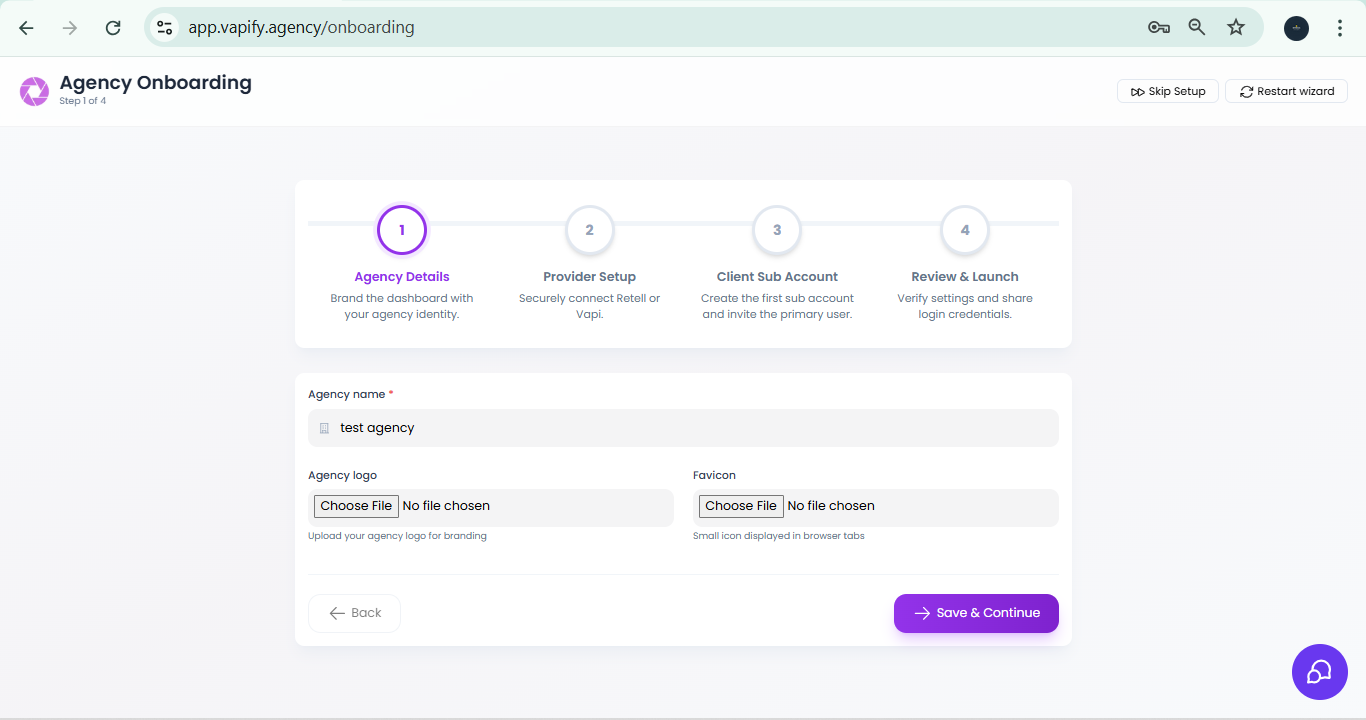
- Agency Name: Enter your agency’s official business name. This will appear throughout the platform and in client-facing areas.
- Agency Logo: Upload your agency’s logo for branding across the dashboard.
- Favicon: Upload a small icon that appears in browser tabs when clients access your platform.
After saving these settings, you’ll need to log out and log back in for the branding changes to take effect across the platform.
Step 2: Provider Setup
In this step, you’ll connect your voice AI provider to Vapify. This connection allows Vapify to retrieve your voice assistants and track usage for billing purposes.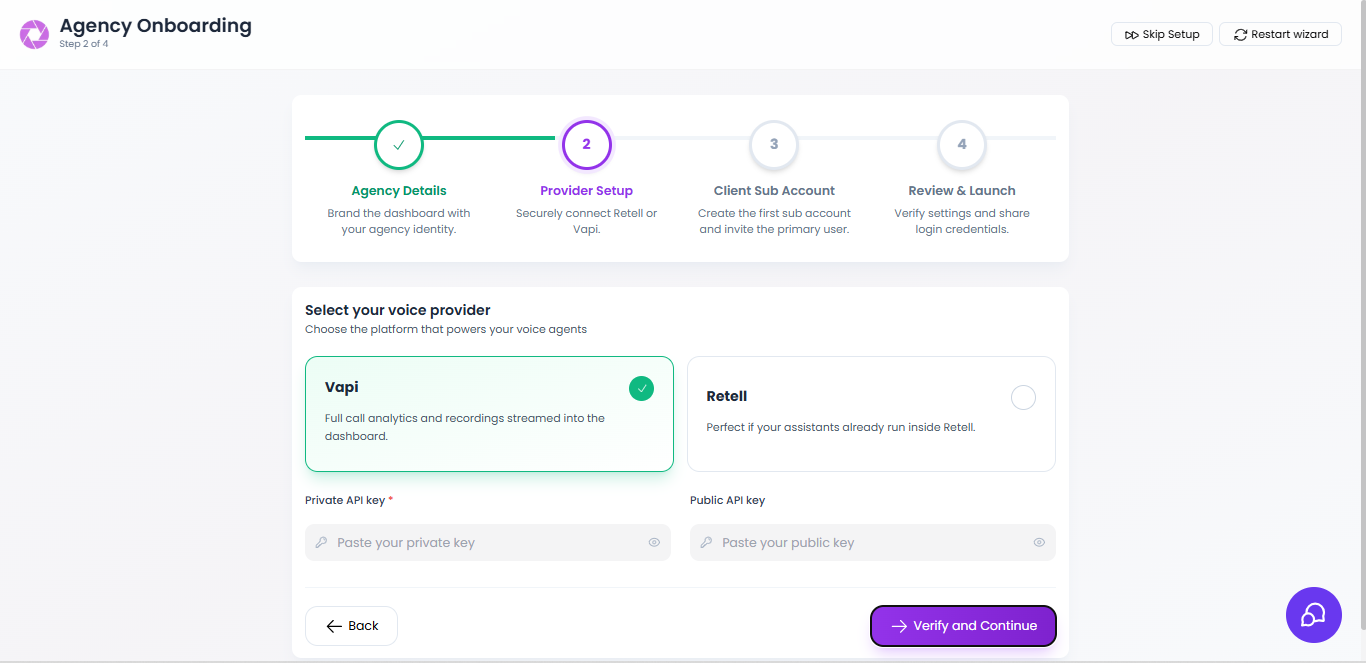
- Provides comprehensive call analytics and recordings streamed directly into your dashboard
- Requires both a Private API key and Public API key
- Get your API key from your Vapi.ai dashboard under API Keys
- Streamlined setup with a single API key
- Perfect if your assistants are already built in Retell
- Get your keys from your Retell dashboard under Settings → API Keys
- Paste your Private API key in the first field
- Paste your Public API key in the second field
- Click Verify and Continue to test the connection
- Select the Retell option
- Paste your API key
- Click Verify and Continue to test the connection
Step 3: Create Your First Client Sub Account
Now it’s time to create your first client sub account. This is where you’ll set up a dedicated space for one of your clients, complete with their primary user account.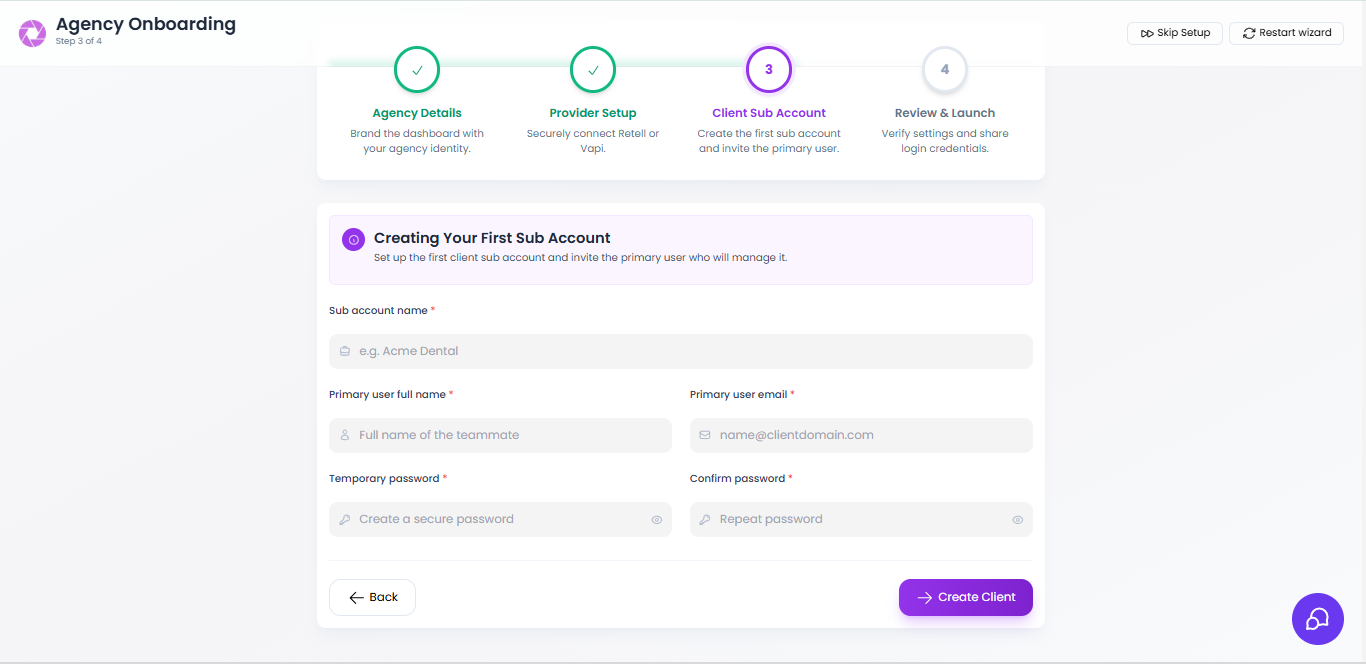
- Sub Account Name: Enter your client’s business name (e.g., “Acme Dental”)
- Primary User Full Name: The name of your client’s main point of contact
- Primary User Email: Their email address where they’ll receive login credentials
- Temporary Password: Create a secure temporary password for their first login
The primary user should be your client’s main administrator who will manage their voice assistants and view analytics. You can add additional team members later from the sub account management page.
- Use your client’s registered business name for professionalism
- Ensure the primary user email is correct - this is where login credentials will be sent
- Create a secure temporary password (mix of letters, numbers, and symbols)
Step 4: Review & Launch
Congratulations! You’ve completed the initial setup. This final step displays a summary of everything you’ve configured and provides the login credentials your client will need.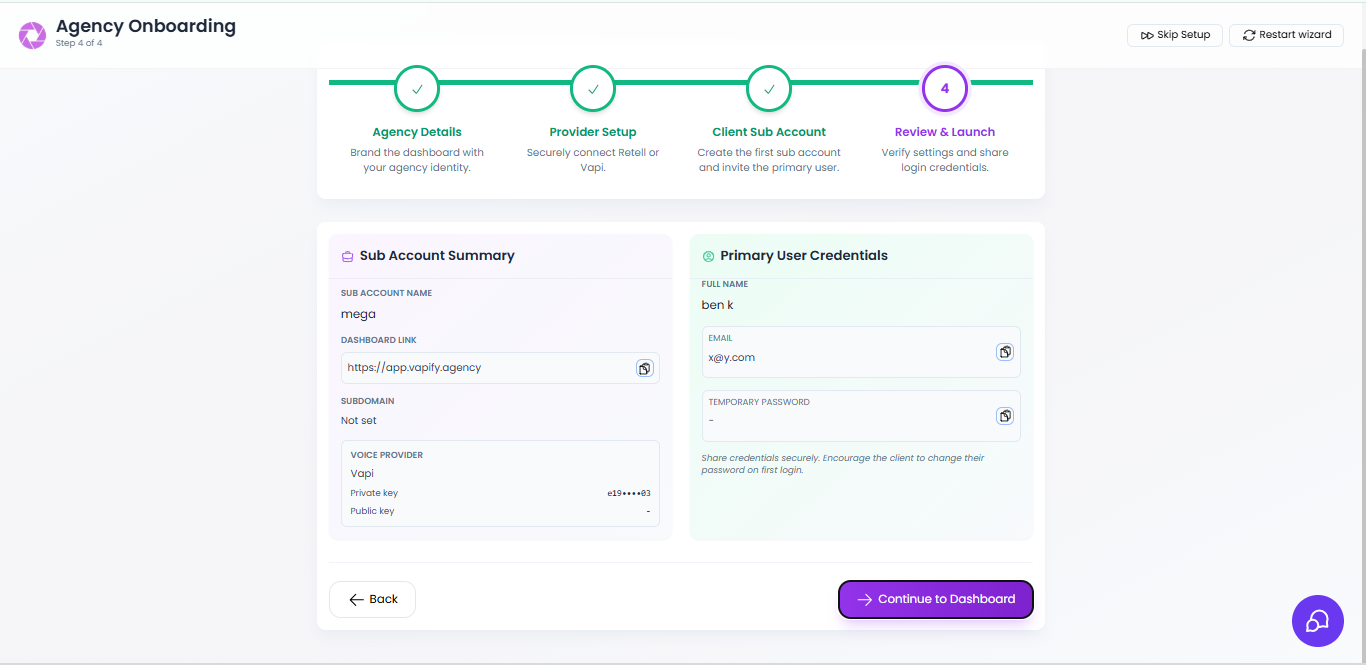
- Sub account name
- Dashboard URL (where your client will log in)
- Subdomain status (not set initially, can be configured later)
- Connected voice provider (Vapi or Retell)
- API keys (partially masked for security)
- Full name
- Email address
- Temporary password
- Copy the temporary password - Save it to your password manager or secure note
- Note the dashboard URL - This is where your client will log in
- Screenshot this page (optional but recommended) for your records
- Share credentials securely - Send the login details to your client via secure email or your preferred communication method
What’s Next?
After completing the onboarding wizard, you’re ready to dive deeper into configuring your agency and clients. Here are the recommended next steps:Set Up Billing & Pricing
Configure Stripe, set per-minute pricing, and establish monthly fees for your clients
Map Assistants to Clients
Assign voice assistants from Vapi or Retell to your client’s sub account
Configure Email Settings
Set up Mailgun, Postmark, or SMTP for automated client emails
Customize Your Subdomain
Create a custom subdomain for your white-label platform
Video Tutorials
For visual learners, here are detailed video tutorials walking you through key configuration tasks:- Agency Branding Configuration
- Subaccount setup
- Billing Configuration
Step 1: Configuring your agency
Step 2: Configuring your sub accounts
Step 3: Billing
Introduction to Vapify
Vapify is a white-label platform designed specifically for voice AI agencies. By integrating seamlessly with Vapi.ai, the largest voice AI platform, as well as other leading voice AI providers such as Retell, Vapify enables you to manage and deploy voice assistants for your clients while maintaining your own brand identity and pricing structure.Explore Vapify
Learn more about Vapify’s features and capabilities.
Get Support
Access our support documentation and resources.
Account Setup
To begin using Vapify, follow these steps:- Sign Up: You’ll receive an invitation from Vapify to create your account. Simply click on the link, fill in your details, and get started with your agency account.
- Log In: Once your account is set up, log in to your agency dashboard using your credentials.
- Basic Configuration: After logging in, head to the Agency Settings to upload your logo, set up custom branding, and configure core settings to match your agency’s needs.
- Sub-Account Configuration: With your agency settings ready, configure a subaccount for each of your clients. Here, you configure your per-minute fee for each assistant and the monthly fee for your client
Create an Account
Sign up and start building your voice AI agency today.
Log In
Access your Vapify dashboard by logging in.
User Interface Overview
After logging in, you’ll be greeted by the Vapify dashboard. Let’s walk through the key sections of the platform:Dashboard
This is your control center. Here, you’ll find key metrics and an overview of your agency’s voice AI operations.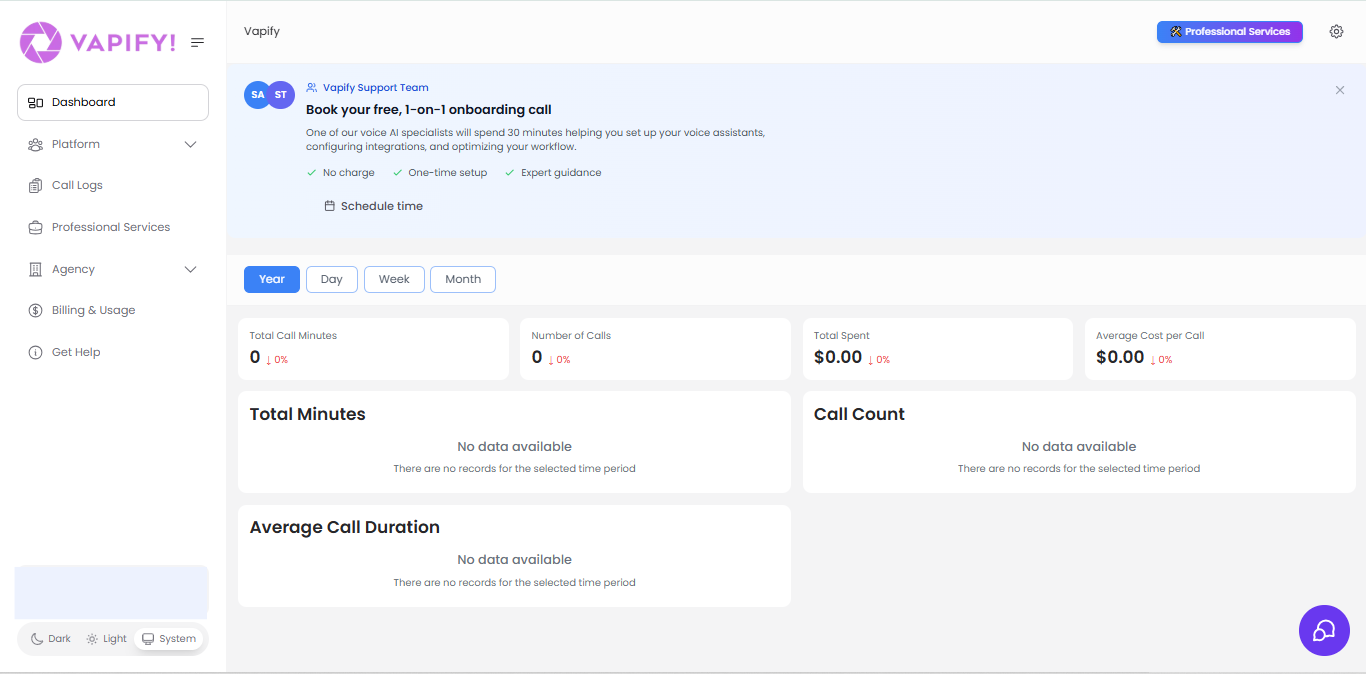
Sidebar Menu
The sidebar is your navigation hub, giving you access to all the main features of Vapify.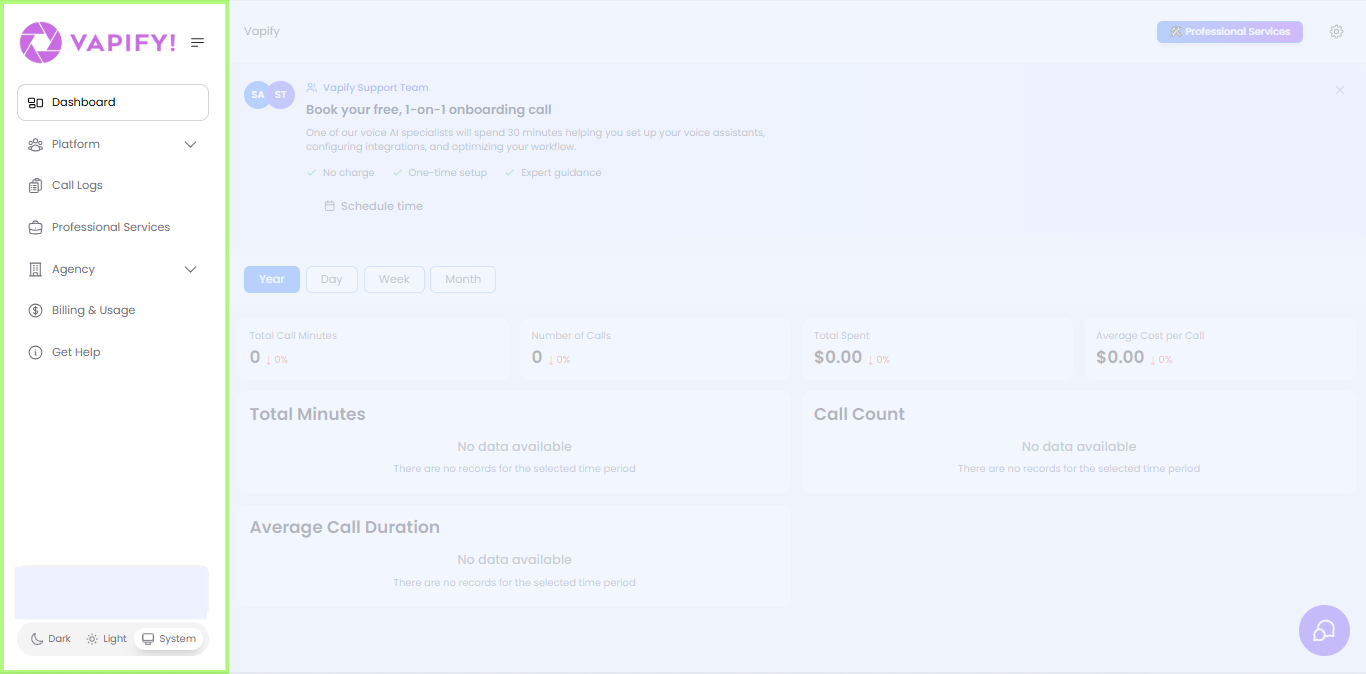
Manage Assistants
Create, configure, and monitor voice assistants.
View Call Logs
Track and analyze your call history and performance.
Set Up Your Agency
Customize your agency’s settings and branding.
Manage Subaccounts
Create and manage subaccounts for your clients.