Assistant Management Overview
Voice assistants are the core product you’re delivering to your clients. In Vapify, assistants are created in your provider’s dashboard (e.g., Vapi.ai) and then assigned to specific subaccounts. Each subaccount can have its own set of assistants with custom pricing.How Assistant Management Works
The Complete Workflow
- Create assistants in your provider’s dashboard (Vapi.ai, Retell, etc.)
- Attach phone numbers to assistants that need to take phone calls (web calls can work without numbers)
- Add provider API key to the subaccount (General tab)
- Sync assistants to Vapify by saving the API key or clicking “Refresh Assistant List”
- Assign assistants to the subaccount (Assistants tab)
- Set pricing for each assistant (Billing tab)
- Go live by setting a billing start date
Important: Vapify does not create or edit assistants. All assistant configuration happens in your provider’s dashboard. Vapify only assigns existing assistants to subaccounts and manages pricing.
Creating Assistants in Your Provider Dashboard
Before you can use assistants in Vapify, you must create them in your voice AI provider’s platform.For Vapi.ai Users:
- Log into your Vapi.ai dashboard
- Navigate to Assistants
- Click Create New Assistant
- Configure your assistant:
- Name and description
- Voice settings
- AI model and prompts
- Functions and integrations
- Attach a phone number if the assistant must handle phone calls
- Save your assistant
For Other Providers:
The same principle applies for Retell and Eleven Labs:- Create and configure assistants in their respective dashboards
- Ensure phone numbers are attached for assistants that handle phone calls
- Keep your API keys handy for Vapify integration
Assigning Assistants to Subaccounts
Assignment Steps
- Navigate to Subaccounts and select the client subaccount
- Go to the General tab and add your provider API key
- Click Save Settings to sync assistants from your provider
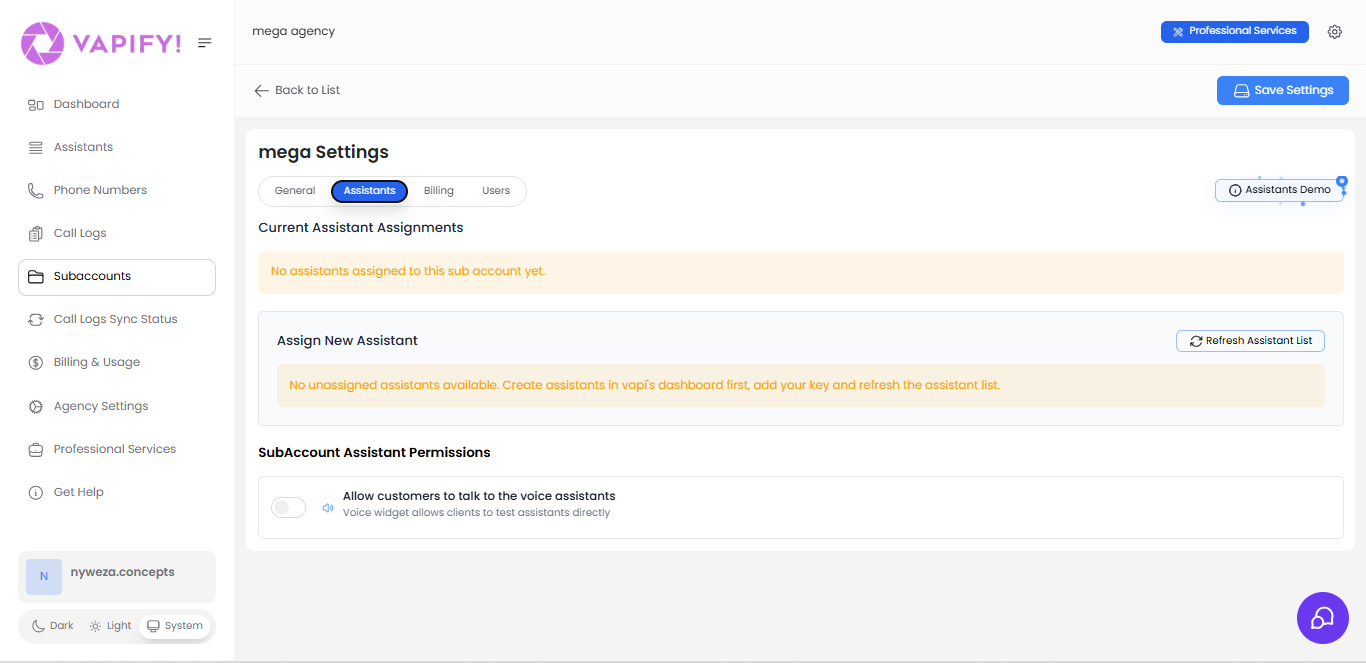
- Switch to the Assistants tab
- Review Current Assistant Assignments (initially empty)
- In the Assign New Assistant section, select assistants to assign
- Click Refresh Assistant List if you don’t see recent assistants
Understanding Assignment
What Assignment Means:- Assigned assistants become available to that specific subaccount/client
- Only assigned assistants appear in the client’s dashboard
- Each subaccount can have different assistants assigned
- Assignments control which assistants the client can use and see analytics for
- Once a subaccount has a billing start date set (has gone live), you cannot edit the provider API keys
- You can still add or remove assistants after going live
- API key lock is permanent—plan your provider setup carefully before going live
Refreshing the Assistant List
Click “Refresh Assistant List” to manually sync the latest assistants from your provider. Use this when:- You just created new assistants in your provider dashboard
- You attached phone numbers to previously unattached assistants
- You renamed assistants or changed phone numbers
- Assistants you expect to see are missing
Setting Assistant Pricing
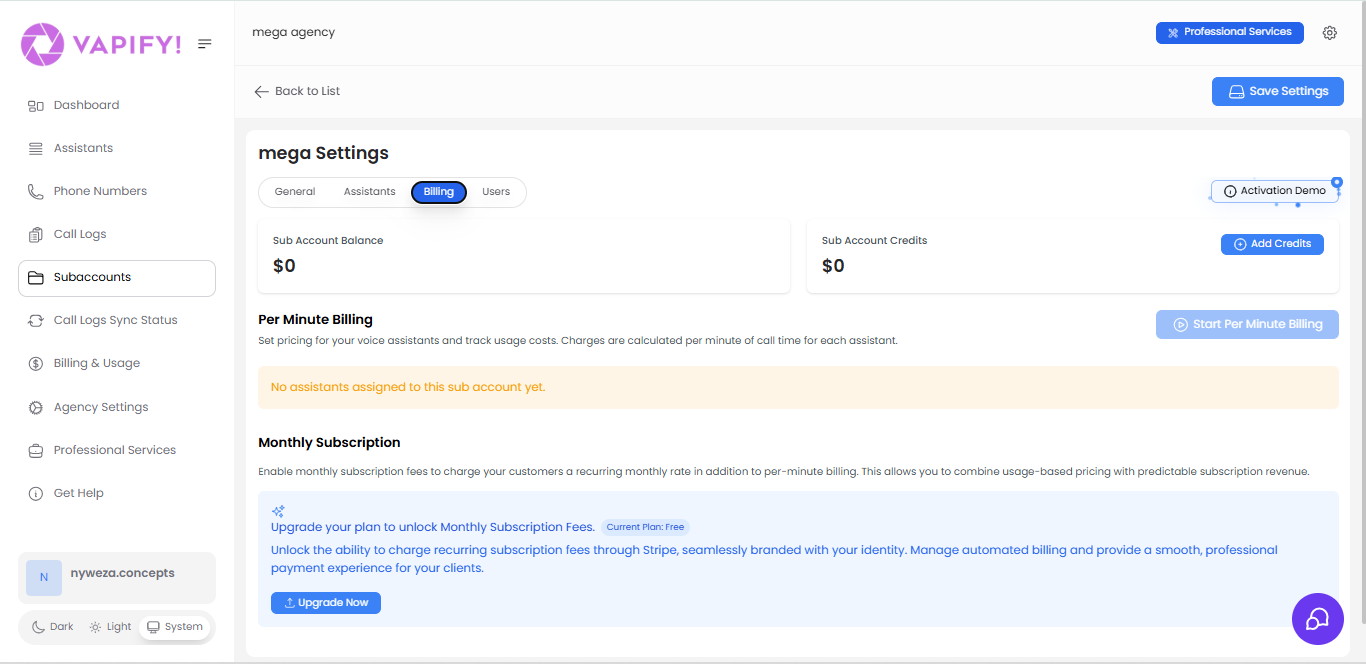
Pricing Configuration
- Navigate to the subaccount’s Billing tab
- Click “Start Per Minute Billing” (if not already enabled)
- For each assigned assistant, set the price per minute
- Ensure your price exceeds what your provider charges you
Pricing Best Practices
Calculate Your Costs:- Check what your provider charges per minute for each assistant
- Add your desired profit margin
- Set that as your client price
- Always price higher than provider costs to maintain profitability
- If your provider changes their pricing, update yours immediately
- Different assistants can have different pricing (complex assistants may cost more)
- Document your pricing rationale for each client
Warning: If you charge clients LESS than your provider costs, you’ll lose money on every call. The platform doesn’t prevent this, so verify your math before going live.
Assistant Permissions
In the subaccount’s Assistants tab, you can control assistant permissions:Voice Widget Access
Toggle: “Allow customers to talk to the voice assistants”- Enabled: Clients can test assistants through a voice widget in their dashboard
- Disabled: Clients only see analytics and usage data (no direct testing)
- Testing assistant responses
- Demonstrating functionality
- Training client staff
- Quick troubleshooting
Platform Assistants View
Go to Assistants in your sidebar, you can see an overview of all assistants across all subaccounts in your agency.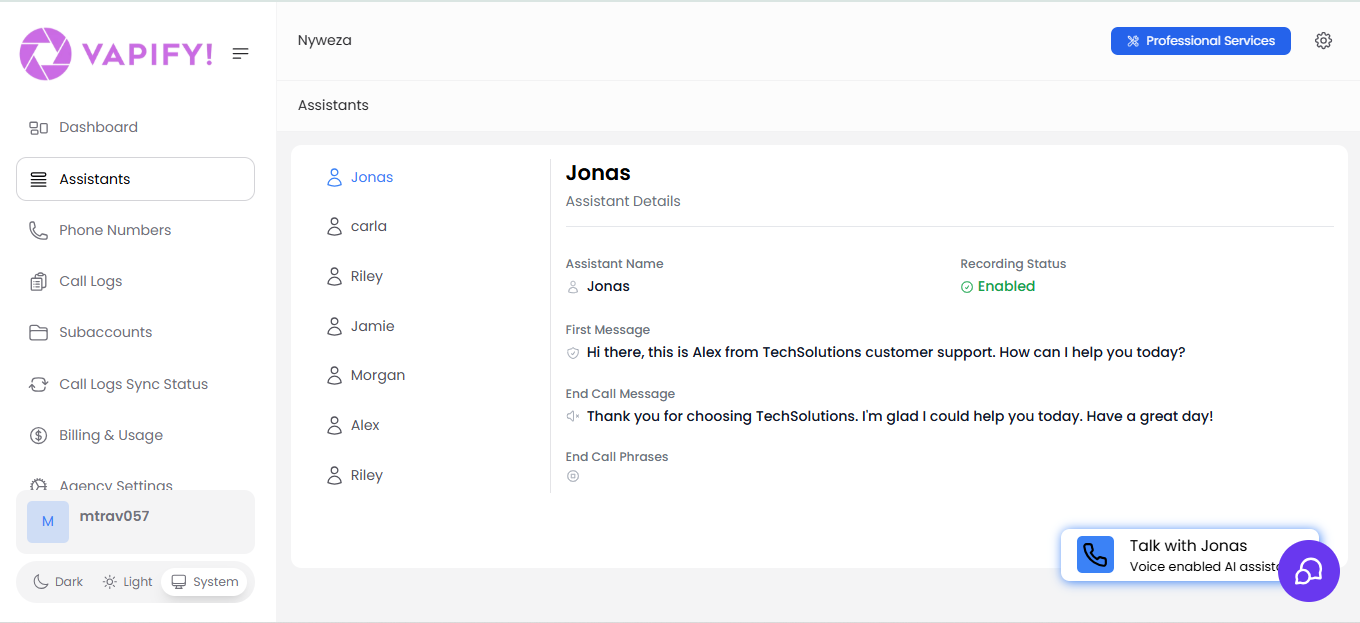
- All assistants from all connected provider accounts
- Which subaccounts each assistant is assigned to
- Status and phone number information
- Quick access to edit assignments
- Get a bird’s-eye view of your entire assistant portfolio
- Identify which assistants are used by which clients
- Spot unassigned assistants
- Plan assistant distribution across clients
Common Workflows
Setting Up a New Client
- Create a new subaccount for the client
- Add provider API key in the General tab
- Sync assistants (automatic on save)
- Go to Assistants tab and assign relevant assistants
- Go to Billing tab and set per-minute pricing
- Test the configuration
- Set billing start date to go live
Adding New Assistants to Existing Client
Before Go Live:- Create assistant in provider dashboard (phone number required only for phone calls)
- Go to subaccount Assistants tab
- Click “Refresh Assistant List”
- Assign the new assistant
- Go to Billing tab and set pricing
Updating Assistant Configuration
- Make changes in your provider’s dashboard (Vapi.ai, etc.)
- Changes automatically apply to all calls
- If you changed pricing in the provider, update your client pricing in Vapify’s Billing tab
Note: You don’t need to “refresh” for configuration changes—only for new assistants or phone number changes.
Best Practices
Assistant Organization
- Use clear, descriptive names in your provider dashboard
- Attach phone numbers to assistants that need to handle phone calls
- Document which assistants serve which purposes
- Keep a naming convention across clients (e.g., “ClientName-SalesBot”)
Pricing Strategy
- Build in adequate profit margin (at least 25-50%)
- Check provider pricing regularly for updates
- Consider complexity when pricing (advanced features = higher price)
- Clearly communicate pricing to clients before going live
Assignment Planning
- You can adjust assistant assignments at any time, including after go live
- Test thoroughly before going live
- Document which assistants each client has
Maintenance
- Regularly check that assistants are functioning in provider dashboard
- Monitor usage patterns to understand client behavior
- Keep provider API keys secure
- Audit assistant list periodically to refresh as needed
Troubleshooting
Assistant Not Appearing in Vapify
Cause: Incorrect API key, not saved correctly, or list not refreshed Solution:- Confirm the provider API key is correct
- Save settings again
- Click “Refresh Assistant List”
Cannot Edit Provider API Keys
Cause: Billing start date has been set (subaccount is live) Solution: This is by design and cannot be changed. You must:- Keep the current provider keys
- Or create a new subaccount if you need to switch providers or keys
Pricing Doesn’t Seem Right
Cause: Provider costs changed, or you miscalculated margins Solution:- Check current provider pricing
- Recalculate your costs and margins
- Update pricing in Billing tab
- Communicate changes to clients if needed
Client Can’t See Their Assistants
Cause: Assistants not assigned to their subaccount, or voice widget disabled Solution:- Verify assistants are assigned in Assistants tab
- Check if “Allow customers to talk to voice assistants” is enabled
- Verify client is logged into correct subaccount
FAQs
How do I create an assistant?
How do I create an assistant?
All assistants are created and edited directly in your provider’s dashboard (e.g., Vapi.ai, Retell, Eleven Labs). Vapify does not create assistants—it only syncs existing ones and manages their assignment to clients and pricing.To create an assistant:
- Log into your provider’s dashboard
- Create a new assistant with your desired configuration
- Attach a phone number if the assistant must handle phone calls
- Return to Vapify and click “Refresh Assistant List”
Why don't my assistants show up in Vapify?
Why don't my assistants show up in Vapify?
Make sure you’ve clicked “Refresh Assistant List” in the subaccount’s Assistants tab. If you expect a phone-call assistant, attach a phone number in the provider dashboard first.
Can I edit an assistant's configuration in Vapify?
Can I edit an assistant's configuration in Vapify?
No. All assistant configuration (voice, prompts, AI model, functions, etc.) is managed in your provider’s dashboard. Vapify only handles:
- Assignment to subaccounts
- Per-minute pricing
- Usage tracking and billing
Can I assign the same assistant to multiple subaccounts?
Can I assign the same assistant to multiple subaccounts?
No. An assistant can only belong to one subaccount at a time. If you need similar assistants for multiple clients, create separate assistants in the provider and assign each to its subaccount.
What happens if I change pricing after going live?
What happens if I change pricing after going live?
You can change per-minute pricing at any time in the Billing tab, even after going live. The new pricing applies to calls made after the change. Previous calls retain their original pricing.
Can I remove an assistant after going live?
Can I remove an assistant after going live?
Yes. You can add or remove assistants after the billing start date is set, but you cannot edit the provider API keys for that subaccount.
How often should I refresh the assistant list?
How often should I refresh the assistant list?
Refresh whenever you:
- Create new assistants in your provider dashboard
- Attach phone numbers to existing assistants
- Change assistant names or phone numbers
- Notice assistants are missing from the list
By effectively managing your assistants, you ensure smooth operations, maintain profitability, and deliver excellent service to your clients.