Overview
Subaccounts are the core of your agency’s client management system. Each subaccount represents one client and contains their voice assistants, billing configuration, and user access. The subaccount settings page has four main tabs: General, Assistants, Billing, and Users.General Tab
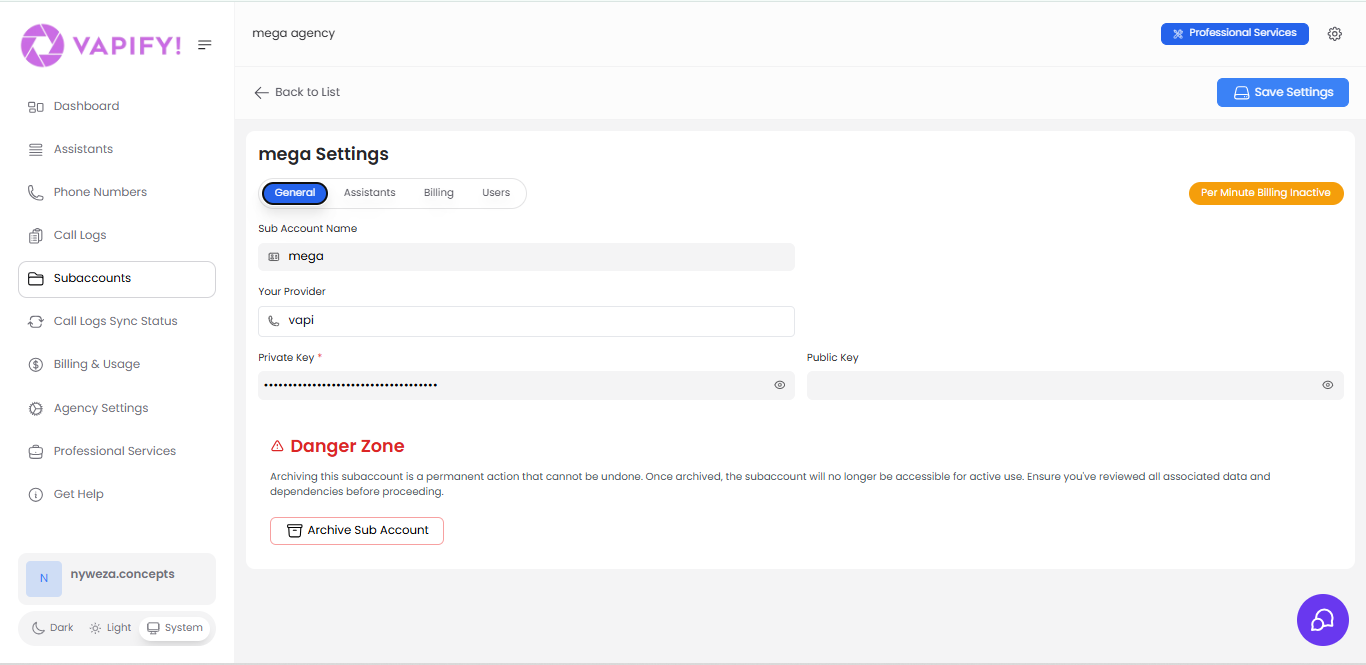
Sub Account Name
The display name for this client subaccount. This name appears throughout the platform and helps you identify different clients.Your Provider
Select your voice AI provider for this subaccount. Currently, Vapify supports:- Vapi
- Retell
Note: Once you’ve set a billing start date (gone live), you cannot edit the provider API keys for this subaccount.
API Keys Configuration
Private Key (Required) Enter your provider’s API private key. For Vapi.ai:- Log into your Vapi.ai dashboard
- Navigate to your account settings
- Copy your Private API Key
- Paste it here and click “Save Settings”
Danger Zone
Archive Sub Account Archiving a subaccount is a permanent action that cannot be undone. When you archive a subaccount:- The subaccount becomes inaccessible for active use
- All billing stops immediately
- Associated data and dependencies are preserved but frozen
- Users lose access to the subaccount
Warning: Only archive a subaccount when you’ve completely finished working with that client and have reviewed all associated data. This action is permanent and cannot be reversed.
Assistants Tab
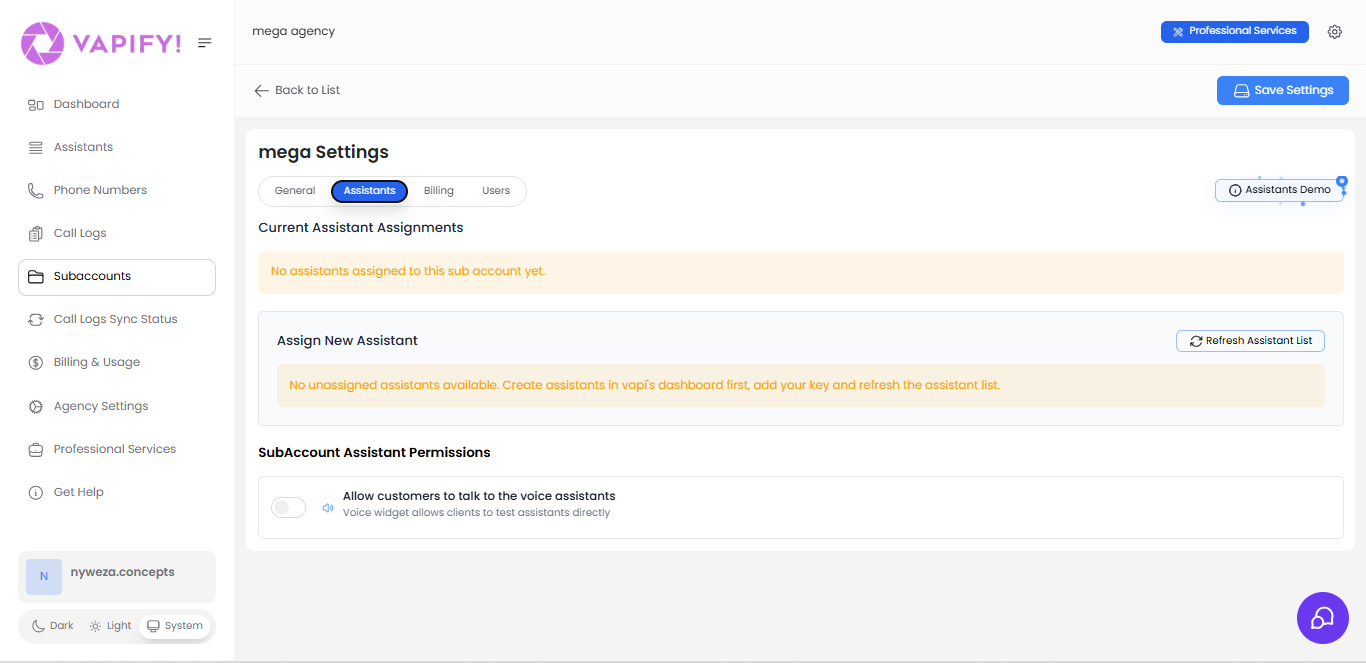
Current Assistant Assignments
This section displays all voice assistants currently assigned to this subaccount. Each assigned assistant shows:- Assistant name
- Associated phone number (if any)
- Current status
- Configuration options
Assign New Assistant
To assign assistants to this subaccount:- Create assistants in your provider’s dashboard first (e.g., Vapi.ai)
- Add your provider API key in the General tab
- Click “Refresh Assistant List” to sync assistants from your provider
- Select assistants from the list to assign to this subaccount
- Configure per-minute pricing for each assistant (in the Billing tab)
- All assistants are created and edited directly in your provider’s dashboard (e.g., Vapi.ai)
- Vapify syncs assistants when you save your API key or click “Refresh Assistant List”
- You cannot create or edit assistant configurations within Vapify—only assign them and set pricing
Refresh Assistant List
Click this button to manually sync the latest assistants from your provider’s account. Use this when you:- Just created new assistants in your provider dashboard
- Made changes to assistant names or phone numbers
- Added phone numbers to previously unattached assistants
SubAccount Assistant Permissions
Allow customers to talk to the voice assistants This toggle controls the voice widget functionality for this subaccount:- Enabled: Clients can test assistants directly through a voice widget in their dashboard
- Disabled: Voice widget is hidden; clients can only see assistant analytics and usage
Note: Once a subaccount has a billing start date set (has gone live), you cannot edit the provider API keys. You can still add or remove assistants at any time after going live.
Billing Tab
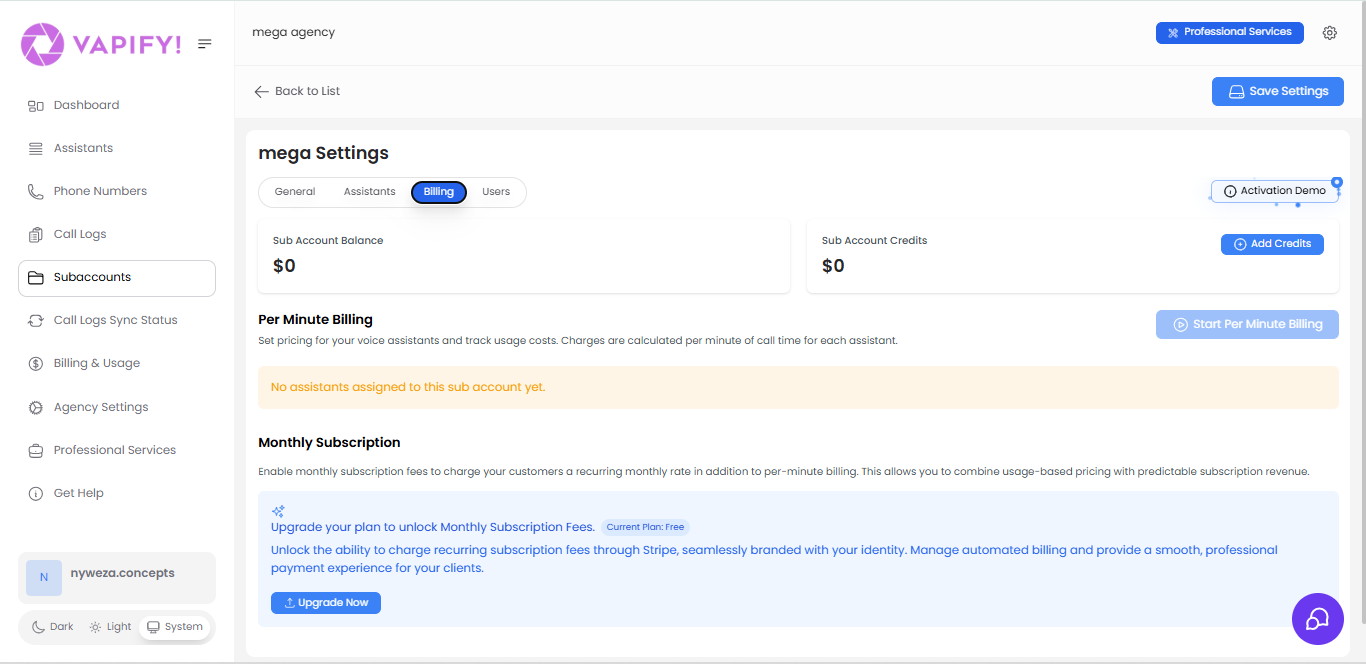
Sub Account Balance
Current Balance: $X The balance represents funds that your client has loaded into their account via Stripe. This is self-service payment from the client:- Clients add balance through Billing and Usage > Top Up Credit
- Payments are processed through Stripe
- Funds are automatically added to your Stripe account
- Balance is used to pay for voice assistant minutes
Sub Account Credits
Current Credits: $X Credits are promotional or bonus funds that you (the agency) manually assign to this subaccount:- Credits are added by clicking “Add Credits”
- Credits never expire
- Credits are always used before balance
- Useful for promotional periods, discounts, or compensating clients
Key Difference: Balance (💰) comes from client payments via Stripe. Credits (🎁) are agency-granted promotional funds. Credits always get consumed first.
Per Minute Billing
This is the primary billing model for usage-based pricing. How It Works:- Set a price per minute for each assistant
- Charges are calculated per minute of call time
- Usage is deducted from the client’s Credits first, then Balance
- Real-time usage tracking in call logs
- Assign assistants to the subaccount (in Assistants tab)
- Click “Start Per Minute Billing”
- For each assistant, set the price per minute you charge your client
- Ensure your price is higher than what your provider charges you
Important: If you have no assistants assigned, you’ll see: “No assistants assigned to this sub account yet.” Assign assistants first before configuring per-minute billing.Pricing Example:
- Vapi.ai charges you: $0.10/minute for Assistant A
- You charge your client: $0.15/minute for Assistant A
- Your profit: $0.05/minute
Monthly Subscription
Enable recurring monthly subscription fees in addition to per-minute billing. This allows you to combine:- Fixed monthly fee (predictable subscription revenue)
- Per-minute charges (usage-based pricing)
- Charge recurring subscription fees through Stripe
- Seamlessly branded with your agency identity
- Manage automated billing cycles
- Provide a smooth, professional payment experience
Manual Payment Mode
By default, Vapify automatically collects payments from your clients using Stripe:- Monthly subscription fees are auto-charged
- Clients can self-service top up their balance
- Invoices show your agency’s branding
- Collect payments from clients directly (outside Vapify)
- Manually update subscription end dates and status
- Manually add credits to client balances
Users Tab

Sub Account Users
This table displays all users configured for this subaccount:Adding New Users
Click “New Sub Account User” to invite additional users to this subaccount:- Enter their first name, last name, and email
- Set their access permissions
- Send the invitation
- They’ll receive an email to activate their account
- Invited: User has been sent an invitation but hasn’t activated yet
- Active: User has activated and can access the subaccount
- Inactive: User access has been disabled
Going Live: Activating Billing for Your Client
Once you’ve configured all settings, you’re ready to activate billing and go live with your client.Prerequisites
Before going live, ensure you’ve completed:- ✅ Added provider API key (General tab)
- ✅ Assigned assistants to the subaccount (Assistants tab)
- ✅ Configured per-minute pricing for each assistant (Billing tab)
- ✅ Added users who need access (Users tab)
Step 1: Ensure Agency Credit
You should have agency credit before activating billing:- Navigate to Billing & Usage in your agency settings
- Check your agency credit balance
- If needed, add funds to your agency credit balance
Step 2: Set Billing Start Date
After confirming agency credit, set the Billing Start Date (also called “Go Live Date”):- Effective Date: All calls from this date forward will be billed
- Can be in the past or future: Useful for backdating or scheduling
- One-time setup: This date can ONLY be set once per subaccount
- Cannot be changed: Choose carefully—this is permanent
Critical: Once the Billing Start Date is set, you cannot:Make sure everything is configured correctly before setting this date.
- Change the date
- Edit the provider API keys
Step 3: Activate Billing
Click “Start Per Minute Billing” (or enable Monthly Subscription) to activate:- Billing begins on the selected Billing Start Date
- Clients can start using assistants
- Usage is tracked and charged according to your pricing
- Call logs and analytics become available
Best Practices
Provider Configuration
- Keep API keys secure and don’t share them
- Test your provider connection before assigning assistants
- Regularly refresh the assistant list if you make changes in your provider dashboard
Assistant Management
- Attach phone numbers to assistants that need to handle phone calls
- Document which assistants are for which client purpose
- Set pricing with adequate profit margin above provider costs
Billing Setup
- Add generous agency credit to avoid service interruptions
- Set billing start dates carefully—they’re permanent
- Use Credits for promotions or client compensation
- Clearly communicate pricing to clients before going live
User Management
- Only invite users who need access to the specific subaccount
- Regularly audit user list and remove inactive users
- Keep client contact information up to date
FAQs
Can I change assistants after going live?
Can I change assistants after going live?
Yes. You can add or remove assistants after the Billing Start Date is set, but you cannot edit the provider API keys for that subaccount.
What's the difference between Balance and Credits?
What's the difference between Balance and Credits?
- Balance (💰): Funds your client adds via Stripe (self-service payments)
- Credits (🎁): Promotional funds you manually add as the agency
- Usage priority: Credits are always consumed before Balance
Why don't my assistants appear in the assignment list?
Why don't my assistants appear in the assignment list?
Common causes are incorrect API keys, keys not saved correctly, or not refreshing the assistant list. Save a valid provider key, then click “Refresh Assistant List.”
Can I change the provider after setup?
Can I change the provider after setup?
No. Once a billing start date is set, the provider API keys cannot be edited. Choose your provider carefully during initial setup.
What happens if my client runs out of balance and credits?
What happens if my client runs out of balance and credits?
Voice assistant calls will fail if there are insufficient funds. Clients should maintain adequate balance, or you can add credits. Consider enabling low balance notifications.
Can I have both per-minute billing and monthly subscriptions?
Can I have both per-minute billing and monthly subscriptions?
Yes! With a Professional Services plan upgrade, you can combine a fixed monthly subscription fee with per-minute usage charges. This provides predictable base revenue plus usage-based income.
How do I archive a subaccount?
How do I archive a subaccount?
In the General tab’s Danger Zone, click “Archive Sub Account.” This is permanent and cannot be undone. Only archive when completely finished with a client and after reviewing all data.